Blog Archives
Snowman Pop-up Christmas Card
Snowman Pop-up Christmas Card
The other week I was trying to decide whether to send out Christmas Cards. This was always something I had wanted to do but just never got around too. Well this year was no different. With finals just wrapping up this last week I felt like I was running around like a chicken with its head cut off. I am so glad this semester is finally over. Now on to the week before Christmas and I only finished one card. Now that all my crafting material and crafting area is set up in an accessible area, I feel a lot more organized then I did before I started this blog site. My wonderful Husband arranged things so I would be able to have my area where I can still see whats going on with our little one if he is playing with his toys. With all this in mind I fully intend on getting those Christmas Cards out next year!!
Well on to the tutorial…I took a few pictures with this one because I think that a picture might better explain the process.
Supplies Used:
- 1/2 Sheet of Blue Construction Paper
- 1/2 Sheet of White Construction Paper
- Glue
- Scissors
- Glitter
- Markers or Crayons
- Ruler
- Pen
Instructions:
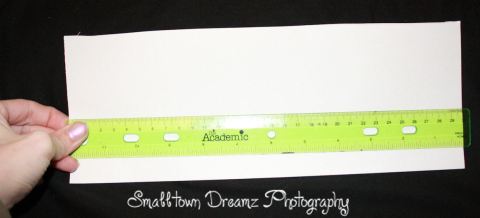
- I had taken a Piece of white printer paper and cut it in half the long way. The White Computer paper really was just not strong enough which is why in the supplies needed I suggested to use white construction paper. Oh and I had gone back and straitened my edge also. Write down the length of the White Paper.

- Cut between 1/8 to 1/2 inch on each short end of the white paper.
- The next step is to fold your white paper in half. You will also want to take a measurement of the width of the white paper at this time.

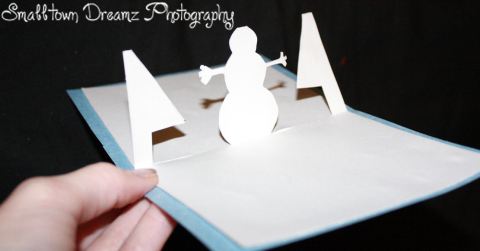
- Then take out your template of whatever shape you want to pop out of the card and trace it on to the white paper. I used a snowman and then free-handed the trees. You can freehand the thing if you want. I just so happen to have a bunch of these templates from other projects that I just recently made.

- Next bend your objects forward slightly and the access paper to the back.

- Open card slightly and tuck your object inside and make sure your access is still sticking up

- Then cut out off the access.
- On fold the entire thing so that it’s stretched out to its full length.

- Fold your card back up so that the object folds inside to the 2 solid white cover pieces.
- Next take your Blue colored Construction paper and cut this in half the long ways also. The width of the blue paper should be measured between 1/8 to 1/2 inch wider then the blue paper and 1/8 to 1/2 inch longer then the white paper.
- Fold your Blue piece of paper in half.
- Then stick in your white paper inside the blue paper to make sure your blue paper is sized up correctly with your white paper.

- Take your white paper out and place it on a scrap piece of paper or table.
- Color, Glitter, Decorate your object and write your message on the bottom or right hand solid section of the white paper. Set aside to dry if needed.
- Decorate and embellish the front of your blue paper.
- If your paper needed to dry or even if it didnt now you can take your white paper and glue it inside your blue paper.

I hope you enjoyed this tutorial on the pop-up snowman card. It was really fun to make. I just wish I would have had more time to get the rest of them done so I could have sent them out to the family. Please comment back and share your christmas pop-up cards.
I hope you and your family have a great holiday season!
Pop-Up Christmas Tree Card
Pop-Up Christmas Tree Card
So I decided to get some other things done this week that I have been meaning to get done instead of focusing on tree decorations. So I started my Christmas Cards. As I was thinking about what my christmas cards should look like I had come across a site that was selling die cut pop up christmas cards. Seeing how we are family on a budget I thought why not try it myself. So I decided to try something simple first. What could be easier than a Christmas Tree it’s just a triangle, and it didn’t turn out to bad. So I thought I would share. It’s something even the kids could do.
Supplies Needed:
- 1 sheet of green paper or a white piece of paper if you want to color in your tree.
- 1 colored sheet for the outside of the card
- scissors
- glue
Instructions:
- Cut your colored sheet to the size you want your card make sure you fold it in half to make sure its the size you want.
- Then measure your green or white paper and measure it so that the paper will be 1/8 to 1/4 shorter on all sides then your outer layer.
- Next you are going to want to cut your green paper and then fold that in half.
- With you green paper folded in half on the edge with the fold take your scissors and cut a line going diagonally down the paper.(Like a side of a triangle.) Then go down a little lower and cut the trunk and the bottom of the tree. When you get to the bottom corner of the tree don’t cut all the way. (This is the part that will keep it attached and allow it to pop out.)


- The next step is open the green paper and push the tree towards you then close the green paper in half.
- Then take your outer layer and wrap that around the green sheet.
- Open them up together and you can see the color shadow behind your pop-up tree.
- Glue your green sheet to your outer layer.
- Decorate with any other embellishments
Thats it. Pretty easy.  Please comment back and remember to come back and share your pop-up Christmas Cards


