Category Archives: crafts
Beaded Flower
Beaded Flower

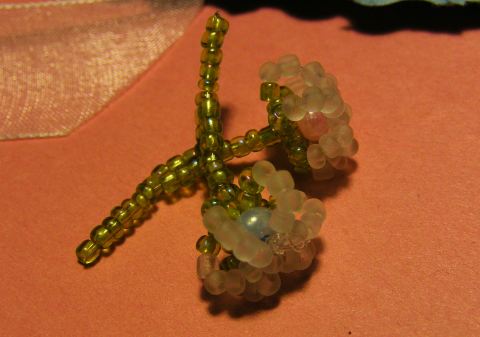
Recently I acquired a bunch of seed beads. For a couple of days I sat there sorting out the colors and just couldn’t decided what to do with them. After searching through some of my books I came across a beaded flower and tried it out for myself. I just wanted to show you the results. I thought it turned out pretty nicely. The little flowers are easy to make and they probably only take about 5-10 min a piece. They are small and can be used for many different types of crafting projects.
If you are interested in learning how to make these cute little embellishments leave a comment with your email address and I will send you a tutorial.

Happy Crafting
My First Sewing Project
My First “Real” Sewing Project

What a great start to the new year. As I stated in an earlier post, I received my first sewing machine this year for christmas. I was so excited to use it that I went to our local Wal-mart the day after christmas and picked up some cheap material that had gone on clearance. After reading the manual from cover to cover, I took my material and started cutting and measuring. I did not have a pattern to go off so I just winged it.  The same day I went and picked up my cheap Christmas Material from Wal-Mart I stopped by our local Joanne Fabrics and bought some clearance material for other projects. I wanted to use the material that I bought from Wal-mart to practice on, However what I thought was going to be just a practice piece ended up being something that I thought turned out pretty nice and I wanted to share.
The tote bag is reversible. I honestly did not think I would enjoy sewing as much as I did after working on this project. There is so much you can do and so much to learn. I am just soaking it all in. I have so many ideas and I can’t wait to make them. I am truly looking forward to being able to make my sons Halloween costumes in the future along with clothing items for myself since there are not many adult clothes in my size and shopping in the older children’s section does not help me look 30. The list goes on and on of gift ideas that I can make for my family for their birthdays and holidays. Now I just have to learn to read patterns, reasons for using different types of stitches, and some other things that I’m sure I will learn with more experience. I look forward to showing you more of my projects as they are finished.
If you have any advice or links on sewing for beginners please leave them in the comments section. I really would like to get into quilting and making clothes. Thank you to all my family and friends for all the support this past year and for all your encouragement for our future. 
Happy Crafting during 2012 from my family to yours!

Fuzzy Sticks Christmas Tree Ornaments
Fuzzy Sticks Christmas Tree Ornaments
A while back I had purchased a package of Fuzzy Sticks (pipe cleaners) at our local dollar store for $1.00 . I was trying to figure out what to do with them and decided to do what everyone does with them. So here are some quick 5 minute or less Christmas Tree Ornaments or Gift Topper ideas. I was really amazed at what I was able to get done while I was waiting for dinner to finish cooking. This is great for kids to do or as a last-minute decoration idea. I really liked working with the Fuzzy Sticks and I can’t wait to get spring colored sticks to continue working with them.
Below I posted the instructions and supplies that will be needed for each ornament. I hope you enjoy making these as much as we did!
Candy Cane
Supplies Needed:
-
1 White Fuzzy Stick
-
1 Red Fuzzy Stick
Instructions:
-
Bend the White Fuzzy Stick in half and then twist it together tightly
-
Do the same for the Red Fuzzy Stick.
-
Take both your White and Red Fuzzy Sticks together and twist them tightly as evenly as possible.
-
Lastly bend one end to make a hook
Thats it!
Wreath
Supplies Needed:
-
2 Green Fuzzy Stick
-
1 Red Fuzzy Stick
Instructions:
-
Take your 2 Green Fuzzy Sticks and twist them together.
-
Then bend it in half.
-
Take your bent half and your other end and bend it into a circle, twisting the ends together tightly.
-
The next step is take your Red Fuzzy Stick and cut about 1/3 of it off to make your bow.
-
Bend the Red Fuzzy Stick to make a small bow.
-
Then cut off another piece of the Red Stick about 1 inch long.
-
Attach your Red bow to your Green wreath with the 1 inch Red Fuzzy Stick.
All there is to it!
Christmas Tree
Supplies Needed:
-
2 White Fuzzy Stick
-
1 Red Fuzzy Stick
-
2 Brown Fuzzy Sticks
-
2 Green Fuzzy Sticks
Instructions:
-
Take your first Green Fuzzy Stick and bend it into a triangle, securing the ends at the top.
-
Take 1 of your Brown Fuzzy Sticks and cut it in half. bend it to make a 3/4 rectangle and twist the ends over the triangle to secure it.
-
Take the other 1/2 of the Brown Fuzzy Stick plus the other whole one and wrap them around your rectangle.
-
Then take your second Green Fuzzy Stick and size it up to the triangle making sure the ends stick over the bottom and over the top about a 1/2 so you can twist it on to the triangle.
-
Do the same with another strip of the Green Fuzzy Stick.
-
Make sure your 2 Green strips are secured to the bottom and the top.
-
The next step is to take 1 of your White Fuzzy Sticks and bend it into a star.
-
Cut a 1 inch Stick out of your other White Fuzzy Sticks and wrap it around the middle of your star and the top of the tree, so to secure the star on top of the tree.
-
Then cut an extra 5 1 inch strips of white and 5 1 inch strips of the red.
-
Take your strips and wrap them around the green spreading them out as you go.
All Finished!!
Like I said these are really quick to make and the kids will love to help. I hope you enjoy. Please comment back and share your Fuzzy Sticks Ornaments.
Snowman Pop-up Christmas Card
Snowman Pop-up Christmas Card
The other week I was trying to decide whether to send out Christmas Cards. This was always something I had wanted to do but just never got around too. Well this year was no different. With finals just wrapping up this last week I felt like I was running around like a chicken with its head cut off. I am so glad this semester is finally over. Now on to the week before Christmas and I only finished one card. Now that all my crafting material and crafting area is set up in an accessible area, I feel a lot more organized then I did before I started this blog site. My wonderful Husband arranged things so I would be able to have my area where I can still see whats going on with our little one if he is playing with his toys. With all this in mind I fully intend on getting those Christmas Cards out next year!!
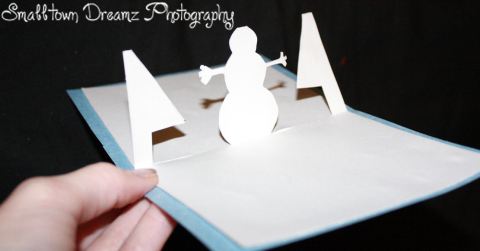
Well on to the tutorial…I took a few pictures with this one because I think that a picture might better explain the process.
Supplies Used:
- 1/2 Sheet of Blue Construction Paper
- 1/2 Sheet of White Construction Paper
- Glue
- Scissors
- Glitter
- Markers or Crayons
- Ruler
- Pen
Instructions:
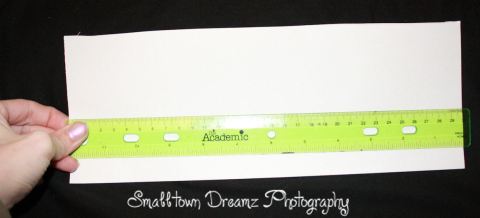
- I had taken a Piece of white printer paper and cut it in half the long way. The White Computer paper really was just not strong enough which is why in the supplies needed I suggested to use white construction paper. Oh and I had gone back and straitened my edge also. Write down the length of the White Paper.

- Cut between 1/8 to 1/2 inch on each short end of the white paper.
- The next step is to fold your white paper in half. You will also want to take a measurement of the width of the white paper at this time.

- Then take out your template of whatever shape you want to pop out of the card and trace it on to the white paper. I used a snowman and then free-handed the trees. You can freehand the thing if you want. I just so happen to have a bunch of these templates from other projects that I just recently made.

- Next bend your objects forward slightly and the access paper to the back.

- Open card slightly and tuck your object inside and make sure your access is still sticking up

- Then cut out off the access.
- On fold the entire thing so that it’s stretched out to its full length.

- Fold your card back up so that the object folds inside to the 2 solid white cover pieces.
- Next take your Blue colored Construction paper and cut this in half the long ways also. The width of the blue paper should be measured between 1/8 to 1/2 inch wider then the blue paper and 1/8 to 1/2 inch longer then the white paper.
- Fold your Blue piece of paper in half.
- Then stick in your white paper inside the blue paper to make sure your blue paper is sized up correctly with your white paper.

- Take your white paper out and place it on a scrap piece of paper or table.
- Color, Glitter, Decorate your object and write your message on the bottom or right hand solid section of the white paper. Set aside to dry if needed.
- Decorate and embellish the front of your blue paper.
- If your paper needed to dry or even if it didnt now you can take your white paper and glue it inside your blue paper.

I hope you enjoyed this tutorial on the pop-up snowman card. It was really fun to make. I just wish I would have had more time to get the rest of them done so I could have sent them out to the family. Please comment back and share your christmas pop-up cards.
I hope you and your family have a great holiday season!
Santa’s Elves Entrance
Santa’s Elves Entrance
 This was such a fun project to work on with my little boy. He is still in the age where anything that lights up or is special is like magic. I was trying to find something for us to do that was different from making decorations for the tree or the walls. I had a big box left over from when we bought our carpet cleaner and decided to use it instead of sending out to the recycling bin. This project ended up looking so nice that we are using as a center piece in our house layout. When we host Christmas this year the food table will be set up near the elves door way and north pole sign. There are also some snowflakes hanging from the ceiling, and the entire house is lit up in blue LED’s. Anyway the kids will love creating this project and it will remain loads of fun for them while it’s on display. It will also make for a great conversation piece with all your friends and family. You can really decorate the house with whatever material you like and design it so that it fits your Christmas Theme. I worked with some materials that I had extras from other projects.
Supplies I Used:
- 1 big box
- 8 sheets of plain red tissue paper
- 2 sheets of red designed tissue paper
- 4 sheets of white tissue paper
- Glitter
- 1 half piece of white construction paper
- Christmas Lights
Instructions:
- Take your box and stand it so it’s the tall way.
- Then take a scissors and cut out your door, just make sure you don’t cut it all the way off.
- Then cut out the bottom of the box.
- Take your roof paper and glue that on to the top of the box.
- Then glue on the siding
- The next step is to glue on the paper for the door.
- With the card board that you cut off earlier cut a strip and fold it a few times to make a square for the chimney and glue that on top of the roof paper
- Take a smaller strip of card board for the door knob and brush a coat of glue on it
- glitter your door knob and then set aside to dry.
- Then with your half sheet of paper make your sign for the door. Ours read Santa’s Elves Only, However yours can say whatever you would like it to say.
- I decorated our sign with glitter also
- Then glue on your door handle after its done drying
- The last step is to finish adding whatever little touches you would like to add to the house. For instance, I added Christmas Tree Lights. If you would like the pattern and instructions for the lights please leave a message for me in the comments section of this post. Thank you
Thats It. Jesse loves this house and plays with it everyday. I really liked the way it turned out and I would be really excited to see how your Santa’s Elves Entrance turns out!!


