Author Archives: Crystalized Designs
Bead Bling!
Hi everyone! I wanted to share this craft with you. I did it a while ago and made a set for myself as well as each of my children’s grandparents for their frig and everyone loved them!!
This is a quick fun craft that is great for a gift. Pictures can be used but also paper, designs, drawings…. there are so many possibilities!!
What you need…
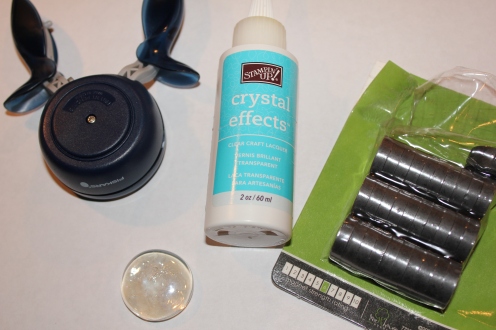
- 1 1/4 inch flat clear circular beads (I bought mine from Hobby Lobby in the wedding section.)
- any clear all purpose glue (Crystal Effects from Stampin’ Up works great. The glue will make the picture more visible when it actually adheres to the gem.)
- 1 1/4 inch circular punch
- magnets (I used magnet 6 strength~ it was strong enough to hold paper on the a frig but is on the thicker side. You can also use cut sheets of magnetic paper but it won’t be able to hold anything.)
- Pictures/paper/design or anything you want to show threw the bead
First, use your circular punch to punch out the image you want to add to the bead. (A great tip I learned in stamping class is to always punch backwards so you can see your image as you punch it! It sure helps people like me that can’t keep things straight!)
Second, put a SMALL amount of Crystal Effects on FRONT of picture (or any other clear glue that you may find to work.)
Third, firmly press image on back side of clear bead and hold for several seconds. It’s best to let it dry completely before next step.
Fourth, put a small amount of Crystal Effect on BACK side of picture.
Next, press magnet where you just placed glue and hold firmly for several second. Let dry overnight. (Keep checking bead as they may start to slip before glue is dry completely, you may have to recenter.)
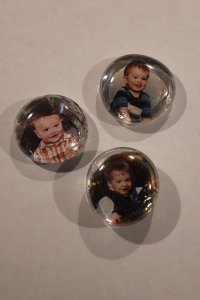
The picture below is what I made for myself and the kids’ grandparents…
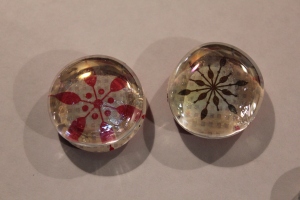
The picture below is what I made in a stamping class the first time ever doing this craft and it was actually just a small part of bigger project… maybe one day I’ll post the entire thing! The background is just paper punched out!
Hope you enjoyed this!
Until next craft…
Delighted!
Hi everyone! I am completely delighted to have this opportunity to reach out to so many people and share crafts, as well as working with Stephanie in brainstorming and giving you great projects ideas! Because I am so delighted to be here, I thought it would be fitting to give you one of my favorite delights…
Oreo Torte Delight
1 pkg Oreos crushed (save 1 cup for topping)
1/2 cup (1 stick) butter, melted
8 oz cream cheese
1 cup powder sugar
16 oz cool whip
5.9 oz box instant chocolate pudding
Make crust by mixing all but one cup crushed Oreos and 1 stick of melted butter and pressing into a 9×13 pan. Combine softened cream cheese, 8 oz cool whip, powder sugar and blend well. Smooth over crust. Make instant chocolate pudding according to directions on package. Smooth over cream cheese mixture. Take remaining 8 oz cool whip and spread over top of pudding. Garnish with crushed Oreos. Refrigerate several hours or overnight before serving.
YUMMY!! A bit messy and very sinful, next time I’ll have a healthier recipe!
By the way, February is ‘Bake for Family Fun Month’ and even though this recipe isn’t baked, I hope you enjoy this as much as I do!!
Until next craft…
Photo Jewels
