Candle Giveaway
Just a reminder to everyone Friday is going to be the last day for our candle giveaway. There is still time, with multiple way to enter. Hop on over to our blog page to get the details on how to enter. http://smalltowndreamz.blogspot.com/2012/02/candle-giveaway.html
Good Bye WordPress
To all my followers
At the end of this month this site will be shut down for good. We moved over to blogger. Blogger allowed us do expand and be a lot more creative. I hope that you will come over to blogger and continue to follow us. In celebration of our move we are doing 4 weeks of giveaways. This week is candle week. We are giving away a mystery candle package (valued at $25.00) from our Independent Partylite Consultant. Please come over to the blogger site and join in our celebration with us. http://smalltowndreamz.blogspot.com/
I hope to see you there. I will miss my readers over here, that is unless of course you come back and follow me on blogger.
Big News for All our Followers
Smalltown Dreamz Has Moved!!!
We love our readers, However Blogger gave us a chance to expand. We just love our new home and we would like you to come share in our excitement. So please hop on over and become a follower again. I promise you won’t be disappointed. You can check out our new site at http://smalltowndreamz.blogspot.com/
Thank You for all your support over these past few months.
Late Night Indulgence
YUMMY!!!
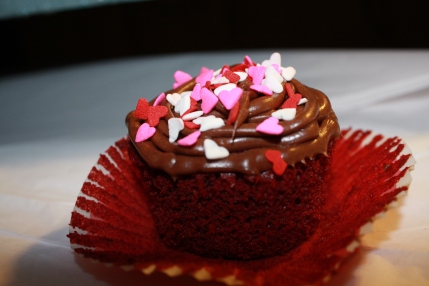
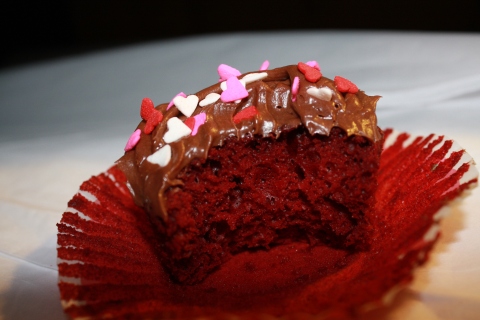
I had to share!! Today my husband made these delicious red velvet cupcakes with chocolate frosting and little heart sprinkles for me and our son for Valentine’s Day. These are the most moist cupcakes I think I have ever eaten. He made these early this morning and it is now nearly 24 hours later and they are still so moist and yummy. Are you like me sneaking into the kitchen in the middle of the night looking for something to snack on. What leftover Valentine’s day treats are you eating? Well Like I said I just wanted to share because they looked so cute and they just tasted so wonderful. Just if you are wondering this was made with the Betty Crocker red velvet cake mix and chocolate frosting is also Betty Crocker and just added and extra teaspoon of oil.
Well have a good night and remember to check in this week for a major announcement. I am really excited about this and its just the begining of great things to come.
Bead Bling!
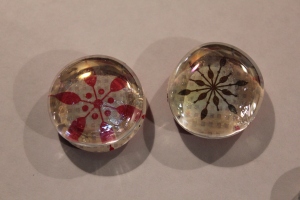
Hi everyone! I wanted to share this craft with you. I did it a while ago and made a set for myself as well as each of my children’s grandparents for their frig and everyone loved them!!
This is a quick fun craft that is great for a gift. Pictures can be used but also paper, designs, drawings…. there are so many possibilities!!
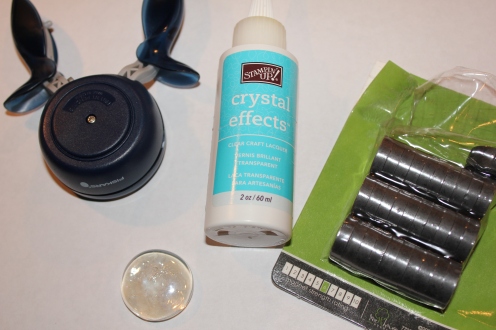
What you need…
- 1 1/4 inch flat clear circular beads (I bought mine from Hobby Lobby in the wedding section.)
- any clear all purpose glue (Crystal Effects from Stampin’ Up works great. The glue will make the picture more visible when it actually adheres to the gem.)
- 1 1/4 inch circular punch
- magnets (I used magnet 6 strength~ it was strong enough to hold paper on the a frig but is on the thicker side. You can also use cut sheets of magnetic paper but it won’t be able to hold anything.)
- Pictures/paper/design or anything you want to show threw the bead
First, use your circular punch to punch out the image you want to add to the bead. (A great tip I learned in stamping class is to always punch backwards so you can see your image as you punch it! It sure helps people like me that can’t keep things straight!)
Second, put a SMALL amount of Crystal Effects on FRONT of picture (or any other clear glue that you may find to work.)
Third, firmly press image on back side of clear bead and hold for several seconds. It’s best to let it dry completely before next step.
Fourth, put a small amount of Crystal Effect on BACK side of picture.
Next, press magnet where you just placed glue and hold firmly for several second. Let dry overnight. (Keep checking bead as they may start to slip before glue is dry completely, you may have to recenter.)
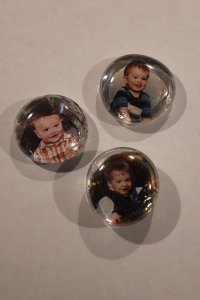
The picture below is what I made for myself and the kids’ grandparents…
The picture below is what I made in a stamping class the first time ever doing this craft and it was actually just a small part of bigger project… maybe one day I’ll post the entire thing! The background is just paper punched out!
Hope you enjoyed this!
Until next craft…

